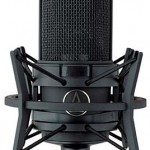
I am interested in looking at recording studios and the kit that goes into them and endlessly fascinated by things like microphone placement.
So a recent video definitely ticked a range of boxes for me. It was a visit to the home studio of song writer and record producer Butch Walker. Butch has been a successful artist in his own right and has written songs for and produced albums for artists like Pink, Fall Out Boy, Weezer, Green Day, Avril Lavigne and Taylor Swift to name just a few.
Butch’s success means he has the resources to push the term “home studio” way past anything else I’ve seen before.
Butch has set up his studio in a lovingly converted quite large former stable block.
 It is large with a spacious live room and looks great with lovely oak walls, nice rugs and large separate zones for guitar, piano and keys, bass and drums. It’s the kind of place you might expect of someone who is successful in the music industry.
However I did not really understand the magnitude and quality of what I was looking at until about half way through the video tour when Butch gets down to talking about microphones (always my favourite part).
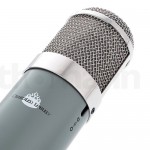
He is in the studio isolation room. There is a drum kit and a piano. Butch points out a mic that he uses as a mono close mic on the drum kit which can also swing round on the stand to double as a vocal mic for someone playing piano. It’s a mic I didn’t know that well – so I looked up Redd 47 – It’s a Chandler Redd 47 valve mic based on a classic EMI mic from Abbey Road – currently retailing for 6 grand! A serious mic in anyone’s book: he’s got my attention!
 Next he goes back into the spacious live room and goes to the other drum kit he has set up. Both kits have the same mic set-up and he can switch from recording one to the other at the patch bay at the mixing console.
For drum mics Butch has industry standard Sennheiser MD 421s. These mics are often used to catch out new sound engineers because they look like they should be side address mics but actually are end address – the test is to see if you set them up correctly. These retail around £300-400 a piece so just about in my ball park – if I was buying 1 but Butch has 4!
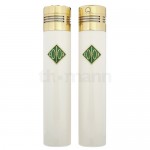 For overheads he has some small diaphragm condensers I wasn’t sure of – initially I thought Neumann KM 184s but it turns out they are hand made Russian Soyuz 013s. They retail for around £1300 for the pair and he has a pair on the kit in the live room and another pair in the drum room. He also has an AEA R88 ribbon mic set up as a room mic for the live room kit (about £2.5 grand). I’m viewing a “home studio” about a million leagues above most!
By now I’m googling every new mic he mentions. His kick drum mic is a Soyuz 017 FET – about 2.4 grand – and he’s got one for each kit (of course he has). He’s also got another Soyuz 017 in a section of the live room set aside for singing and acoustic guitar. Also on the kick drum on the beater side he’s got an AKG C414 (around £1000) set in figure of 8 to pick up the kick and the bottom of the snare. Above the snare he’s using a vintage Calrec 1050C (about £400) – he’s got 2.
When he goes back into the drum isolation room it turns out he also has a Leslie Rotary speaker in there for that Hammond organ sound – with “a couple of Coles 4038s” on it. That’s a vintage design ribbon mic that retails at around £1200 – and he’s got a pair.
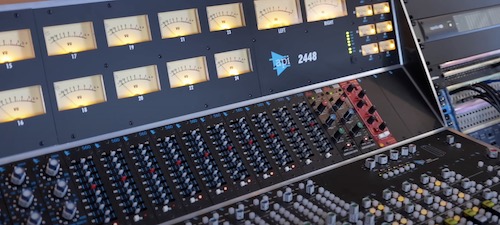 Butch continues explaining what he uses in the studio – I’m amazed at how matter of fact he is with all this kit that mostly has high end price tags. Towards the end he moves to the mixing console area (he doesn’t like having a control room as it’s too isolating).
His monitors “are just some that people were raving about”. So he tried them out and loved them so much he just bought them there and then. I google them – they are PCM 6-2s and a pair will set you back nearly 10 grand. He also goes on to discuss the analogue mixer console which is an API 2448 – I just googled it. No change out of £103,000 for one of those!
There is more too with 20 or so guitars including quite a few Gibsons in the electric section and a Martin or 2 in the acoustic section. In addition there are quite a few desirable items in the racks around the mixer including the UA OX top box (around £1000) plus quite a number of keyboards and synths too plus stacks of speakers and guitar heads and amps.
 In the end I am overwhelmed by his set up – and more than a little bit jealous too. It may seem that I’m fixated on the prices and I am a bit because once I started looking things up as he mentioned them I just could not believe that everything you looked at is a high end premium price of kit. I’ve added a few mics to my wish list (which was already quite extensive) I’d just love the luxury to be able to choose the right piece of kit you need without being concerned about the price of it.
The studio has a lovely live room with lots of space and a natural but not obtrusive acoustic and Butch has mountains of gear including loads of pretty expensive stuff. However in the end what comes across is that everything there is the right tool for the job – an ethos I can understand.
 Butch has been involved in a considerable amount of success over the years which has allowed him the resources to create this great space for making music and to fill it with some high quality kit. He knows what he’s doing with all of it and has used it to make hit records so I can’t really begrudge him his success or studio and he really does have some great kit – especially the mics.
But – although it seems he does actually live there – I’m not sure it really is a “home studio”.
You can see the video on YouTube
Chris Radley – dVoiceBox studio

